Tracey Thorne
Artist Picks - My Favourite Materials
Making Cyanotypes at Home or in the Community
Cyanotype is one of the simplest and most rewarding forms of photography you can do without a darkroom. All you need is a few key materials, a safe working space, and either sunlight or a UV lamp. This process is ideal for experimenting at home, in schools, or as part of community workshops because it is affordable, flexible, and produces striking results.
This page and worksheet bring together:
-
A short history of cyanotype and its connection to science and art
-
An overview of the process and materials you might use
-
Practical recommendations based on what I use in my own practice
-
Links to suppliers and examples of where to source materials in the UK
It is designed as both a resource for beginners and a reminder for anyone wanting to refresh their skills. You can use it as a website guide, or as a handout in a teaching or community setting.
History of Cyanotype
Cyanotype is a photographic printing process that dates back to 1842, invented by Sir John Herschel, an English scientist. Herschel was the first to use this process to make blueprints of scientific drawings, and it quickly became a popular method for copying documents and images. The process involves a simple reaction between two chemicals, which, when exposed to UV light, result in the distinctive Prussian blue hue.
The process gained artistic fame through botanist Anna Atkins, who is often credited with being the first to publish a book illustrated with photographs in 1843. Her botanical cyanotypes were an early and innovative fusion of art and science. Atkins’s work paved the way for future exploration in the world of photography, particularly within the context of botanical illustration.
Today, cyanotype is widely appreciated not only for its historical importance but also as a creative and accessible medium that has found a place in modern-day art and photography.
Making Cyanotypes at Home or in a Community Setting
This worksheet is designed to guide you through the process of making cyanotypes at home or in a community setting. Whether you're completely new to the technique or just looking to refresh your skills, this step-by-step resource will help you understand how cyanotypes work and how to create your own striking blueprints. With practical tips, space to experiment, and the support of a shared creative environment, you'll gain the confidence to continue exploring and making cyanotypes on your own.
Materials You Might Need to Make Prints:
If you're planning to create your own cyanotype prints, here is a list of recommended items that you might need based on some of the things I use.
All these materials are available through affiliate links on my website or independent suppliers:
Cyanotype Chemicals
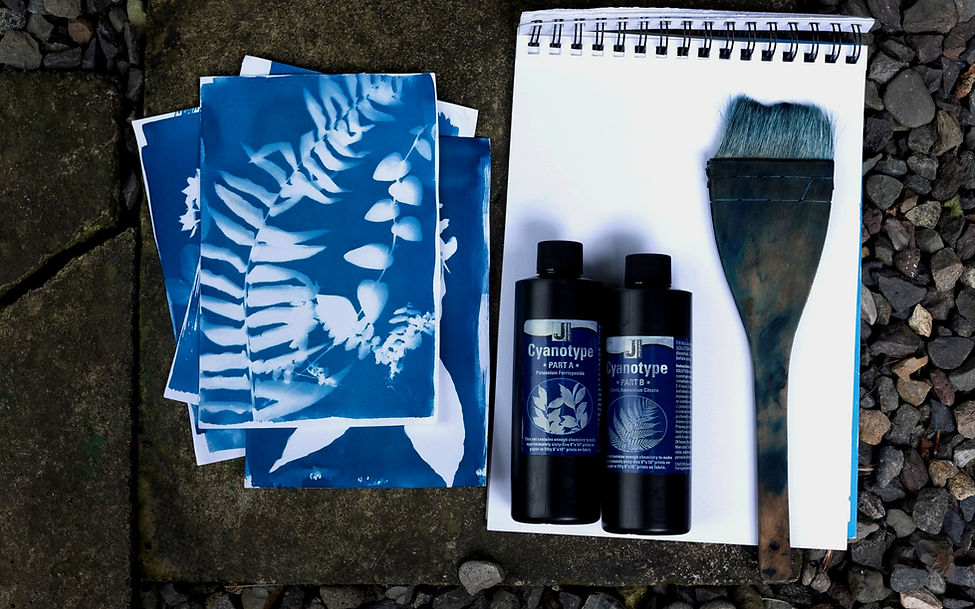
Cyanotype begins with preparing the chemicals that make your paper or chosen material light-sensitive. These chemicals are ferric ammonium citrate (Part A) and potassium ferricyanide (Part B). Depending on the type or brand of cyanotype solution you are using, each part will need to be mixed with distilled water to create stock solutions—either as a full bottle or in small batches as needed.
As I'm based in the UK, I mainly use Jacquard Cyanotype solutions, so I always recommend when starting out using the cyanotype process to start with the small pre-mixed sensitiser sets, you get two bottles (A & B) of both the chemicals you need, and you just need to add distilled water.
Jacquard Cyanotype set - Amazon
Distilled Water
Always use distilled water to mix your cyanotype chemicals. I use Lucemill, and you can buy it in different qualities.
Lucemill Distilled Water – Amazon
Brushes or Pads - for coating
I use two types of brushes, depending on what I am coating and size. I also use a brush for fabric and textured surfaces.
Cottam Brush Set £5.99 Amazon
Flat Hake brushes£6.99 - Amazon
Measuring Tools
To measure out your chemicals when you use them, you need measuring spoons, jars and or syringes. I use syringes when I want to be really precise. You can get measuring equipment in local high street shops really cheaply.
Contact Frames
To make prints unless you're making photograms with large/thicker objects you will need to use a contact frame.
I recommend starting your visiting a local glass shop and ordering an A4 sheet of glass with an extra 1 inch all around so that when you clip it, anything a4 size will not be ruined by the clips. Get the glass bevelled and ask for the thickest type of glass they do. Avoid cheap and thin picture frames, although they can work ok, but often break.
I usually pay about £12 for a frame up with my spec. If you're in Birmingham, I go to Yorks in Kings Heath and Kings Heath Glass do an extra-thick glass for larger frames.
I also use large bits of glass and even Perspex for large work. You really need to think about glass if you go bigger than A3. Sometimes old pictures or glass tables are off cheap and better quality thick glass.
Exposure Lights
You can and should have fun using UV light from the sun.
I often work indoors using A3 lamps and have various types depending on work. Mostly I use two from a lovely independent company, which is good for A3 and A4 or smaller. They shi them really fast about £50, and every so often you will need to change the bulbs.
Cyanotype lamp - https://cyanotype.co.uk/product/uv-lamp-for-alternative-photography
Everbeam 365 can by rigged up in a cardboard box – Amazon
I prefer the exposure I get from my lamps.
Always take care when using indoor UV lamps as they can cause serious eye damage. I don’t stay in the room when they are on.
Developing Tools
I mainly use developing trays or large wham boxes to wash my cyanotype prints in once exposed. Wham boxes can be picked up at the Range or other hardware shops.
Paterson set of 3 developing trays £38.95 – Amazon
Paper
You can have fun experimenting with all sorts of paper, new and old, it really is amazing the different results. I just list here what I mainly use;
-
Arches Plantain – sheets from Parallax Photographic Coop
-
Fabriano – Fab 5 (NOT or HP) or Accademia sheets Jackson Art
-
Fabriano Fat Watercolour pad 25 sheets 280 gsm £13.99 – Amazon
-
Awagmai Papers – I really like Kozo paper bought in sheets at Jackson Arts
-
Awagami – I use a lot of cheap Masa paper only £1.40 per large sheet, for us in journals and testing – Jackson Arts
Acetates
In the UK, it can be harder and expensive to use some of the acetates that many recommend for cyanotype.
I have tried and tested this brand that I buy on Amazon, and it works well for me
PPD – A4 pack of 100 acetates £35 – Amazon
A3 acetates – I buy these from Surry Ink Jet Company
For larger acetates, contact a local printer.
Drying
You should always dry your prints away from direct sunlight. Shake off any excess water and hang them straight, not at an angle, using either pegs or special trouser hangers. Don’t dry flat.
Washing line – pick one up in your local shops
Mink pegs soft grip – Amazon
Metal Hangers with clips – Amazon
Printer
Recommended to us Epsom, but I am currently using a Canon Pixma – Amazon
Adobe
To make digital negatives, you will need access to Photoshop or a similar photograph package so that you can invert the negative
Safety Notes
Cyanotype is a low-toxicity and relatively safe photographic process, but there are still some important things to keep in mind when working at home or in a group:
-
Chemicals: Ferric ammonium citrate and potassium ferricyanide are safe to handle in small workshop settings but should not be ingested. Always wear gloves when mixing or coating paper, work in a well-ventilated space, and wash hands after use. Store solutions in clearly labelled bottles away from children and pets.
-
UV Light: Never look directly at UV lamps. Prolonged exposure can damage your eyes and skin. If you are using a UV lamp indoors, leave the room during exposures. Sunlight is a safe alternative but less predictable.
-
Glass: Thick glass is best for contact frames, but it can break if handled carelessly. Always bevel or tape the edges to avoid cuts, and never press down with force when placing objects or negatives under the glass.
By following these simple safety practices, you can enjoy making cyanotypes safely at home or in community workshops.